Programming Bay
Updated Aug 13, 2023
The programming bay could be made out of just about anything, even cardboard, and kits are available. But I decided to be stubborn (foolish?) and make one out of metal. In the process I discovered a solution to a minor mystery.

I made my own 1:1 drawing in SolidWorks using information produced by Craig R. of the builders club. Then I copied outline and drill locations to a piece of sheet metal.

The round holes were made using a step drill bit that had all the sizes I needed, including 7/16" and 11/16". The tape opening was first drilled a bunch of times along the edges with a 1/8" bit. Then a Dremel bit was used to complete the cut, using a "fence" to make it straight. Unfortunately the bit jumped a few times, so I will have to fix the edges of that opening.
Below are the 2 items I bought for cutting. The step bit was $13 and the cutting bit was $8.


I bought some nylon plugs to use for the round labels. I believe the original used something similar instead of stickers. I'll paint and letter them, obviously. They can be found by searching for 62PP043BG17 online.
The photos below show front & back of panel with these installed in 7/16" holes.


Because these plugs are glossy nylon, extra steps are needed to make paint stick well. First, I de-glossed the plugs with fine sandpaper
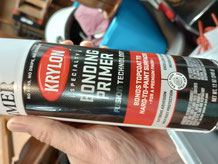
Then I coated them with bonding primer. Bonding primer is specialized, more like an adhesive, and will work better on non-porous surfaces than general-purpose primer.
I bought this at Lowes because I couldn't find the Krylon one anywhere else locally. Rustoleum and XIM also make spray can bonding primer. But because I've had issues painting over Rustoleum primer with non-Rustoleum paint, I decided to try the Krylon.

I found a few colors of gloss enamel acrylic hobby paint at Hobby Lobby. These are a little dark, so I'll mix them with white.
Once the plugs are painted & glossy, I'll use waterslide paper to add the text and then topcoat with clear to seal them in.

After I folded the "wings" together, a co-worker tacked them in place with his welder. I used plumbers epoxy putty along the seams inside and outside. I also had to fix the edges of the rectangular cutout which I did with 5-minute epoxy.
My plan is to paint the wings flat black and the panel a light silver/gray. The original prop's programmer did not have wings but I want to black out the inside of the torso from being seen.


There has been a mystery about this item in the programming bay. In some fuzzy photos it looks like the back of an old style potentiometer (which I do have) but in this view it looks like a flat knob of some kind with a set screw. In this case the potentiometer or switch is mounted normally.
It isn't clear if/when it was mounted the other way, or if it is a trick of the photo angle in the other images.

I now believe it is (or is similar to) the "preset wheel" from a Fender Jazzmaster or Jaguar guitar. These parts are readily available online for about $12.
One caveat is that there are some foreign copies which have a different sized hole in the middle.
The knurled edge would have made it possible for someone inside the robot to use the control, and that is my belief as to why they used it. I think it could have been used as a power shut-off when used with a switch instead of a pot.